.png)
Creating a SIP Trunk with Wiretap Telecom
How to Create a SIP Trunk
Wiretap Telecom SIP Trunking enables seamless inbound and outbound voice connectivity with your preferred PBX. Set up and start testing with ease by following our guide.
Step 1: Sign in to the Wiretap Portal
Navigate to Wiretap Portal and sign in using your account login credentials.
Step 2: Create a SIP Trunk
Navigate to Trunking —> Manage Trunks —> Trunks. Click on the blue plus sign + to add a new trunk.
.png)
From here, you’ll fill in the necessary information:
Trunk Name: Name your trunk.
Description: Give your trunk a description for your reference
IP Authentication / Registration: Choose whether you’d like to authenticate via IP or registration
Port: Choose a default port (accepted range: 5060-5080)
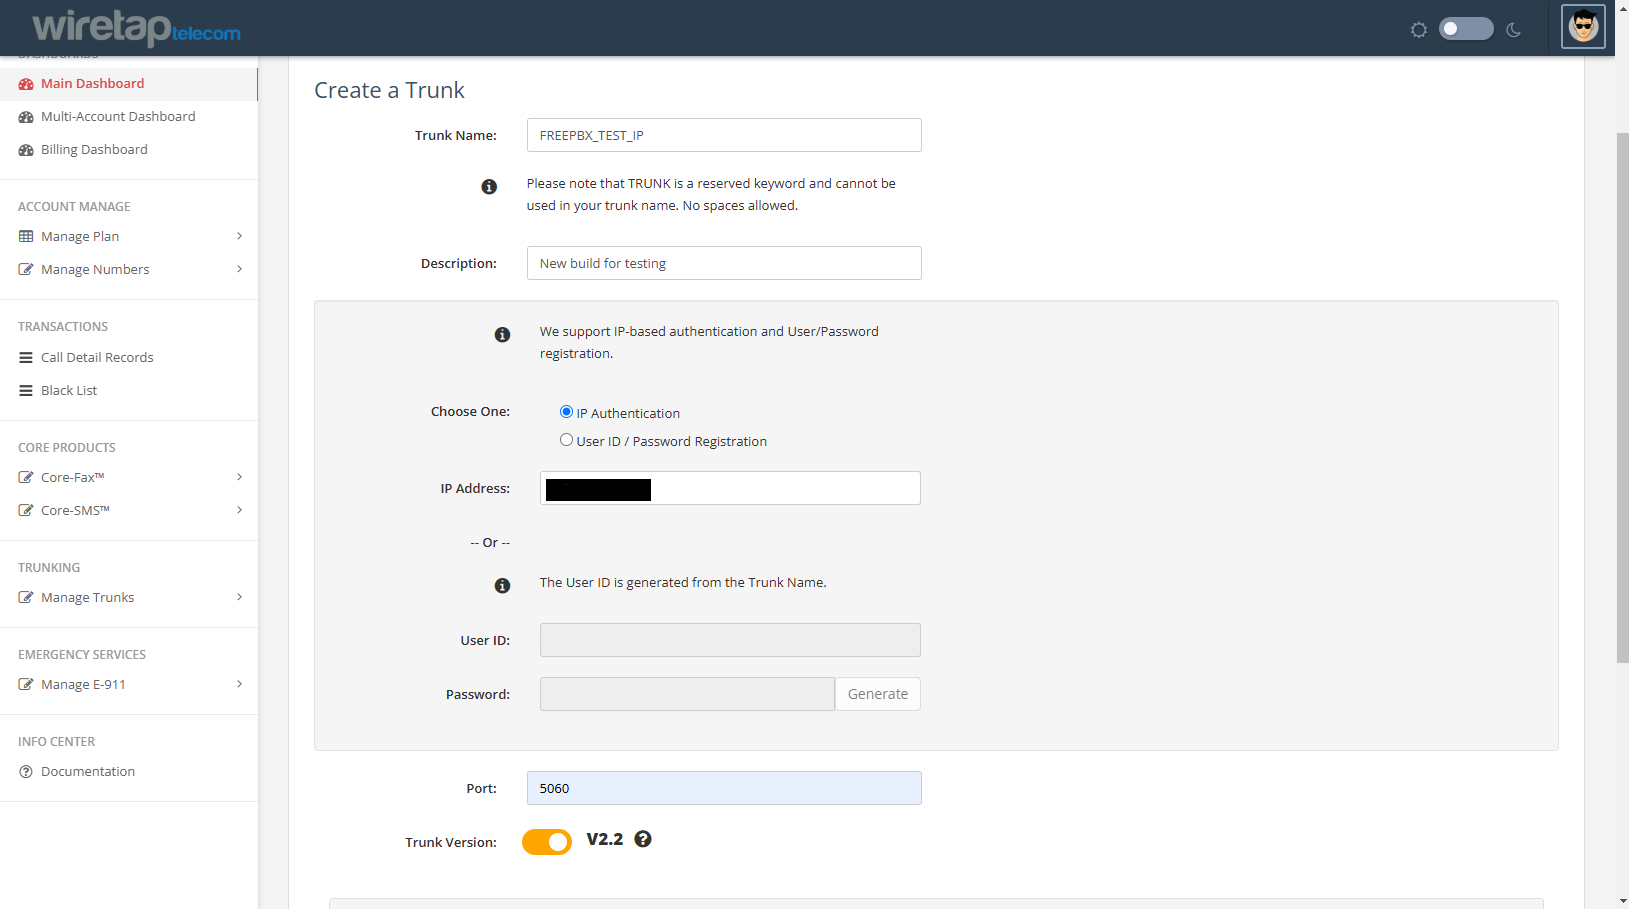
IP Authentication Example
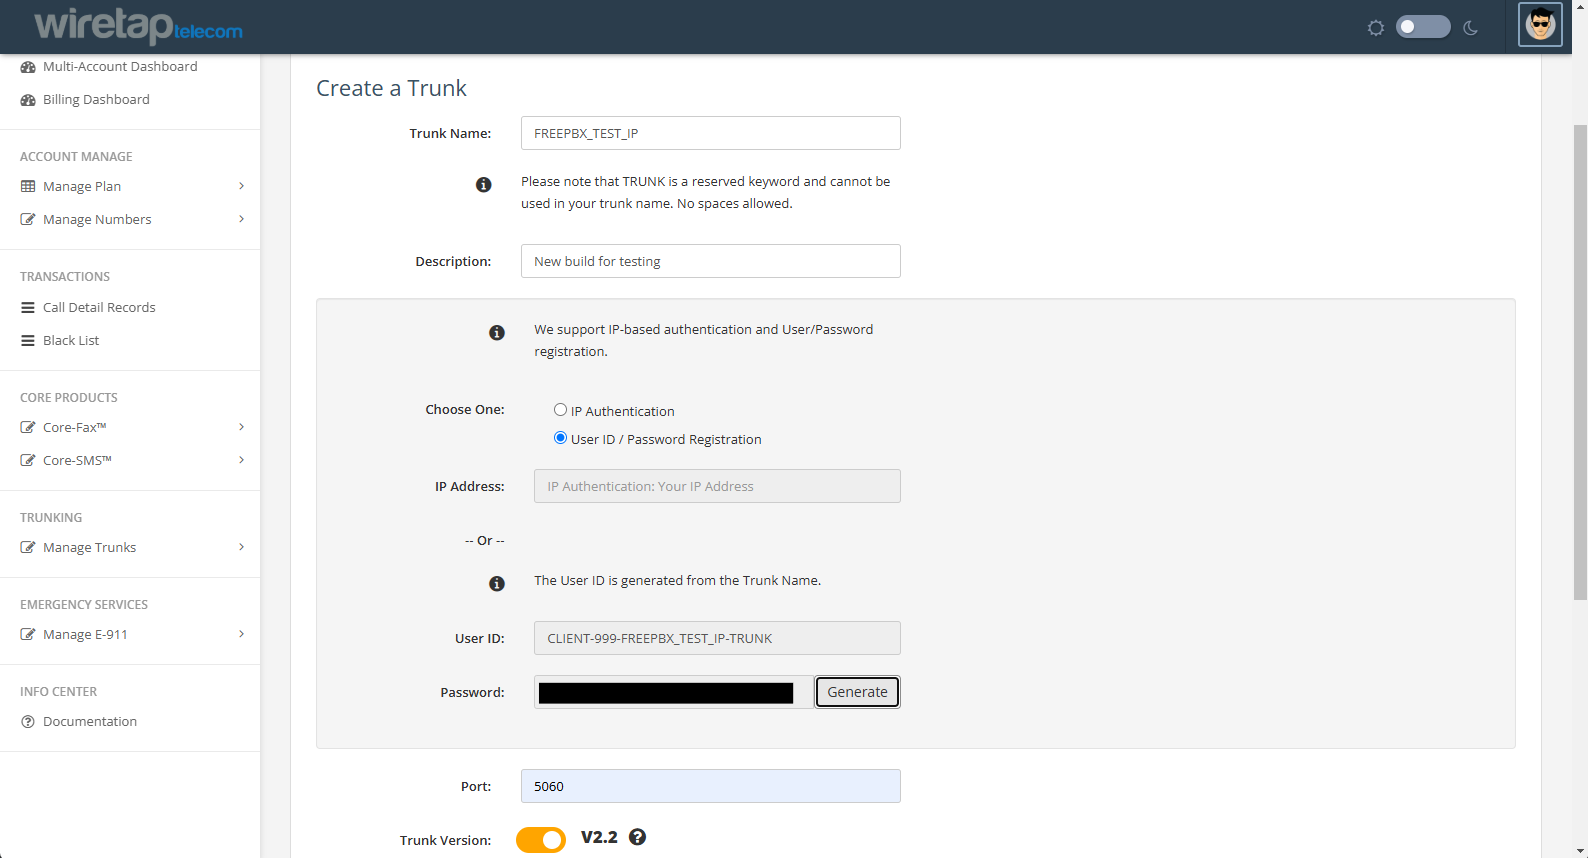
Registration Trunk example
User ID and Password
Click “Generate” to create your registration password. This is what you’ll use to register your trunk with your preferred PBX.
Press Save. Your trunk will now be provisioned.
Step 3: Add DID(s) to Your Trunk
Head to Account Manage —> Manage Numbers —> Numbers
Select the DID(s) you’d like to associate with the trunk you created in Step 2
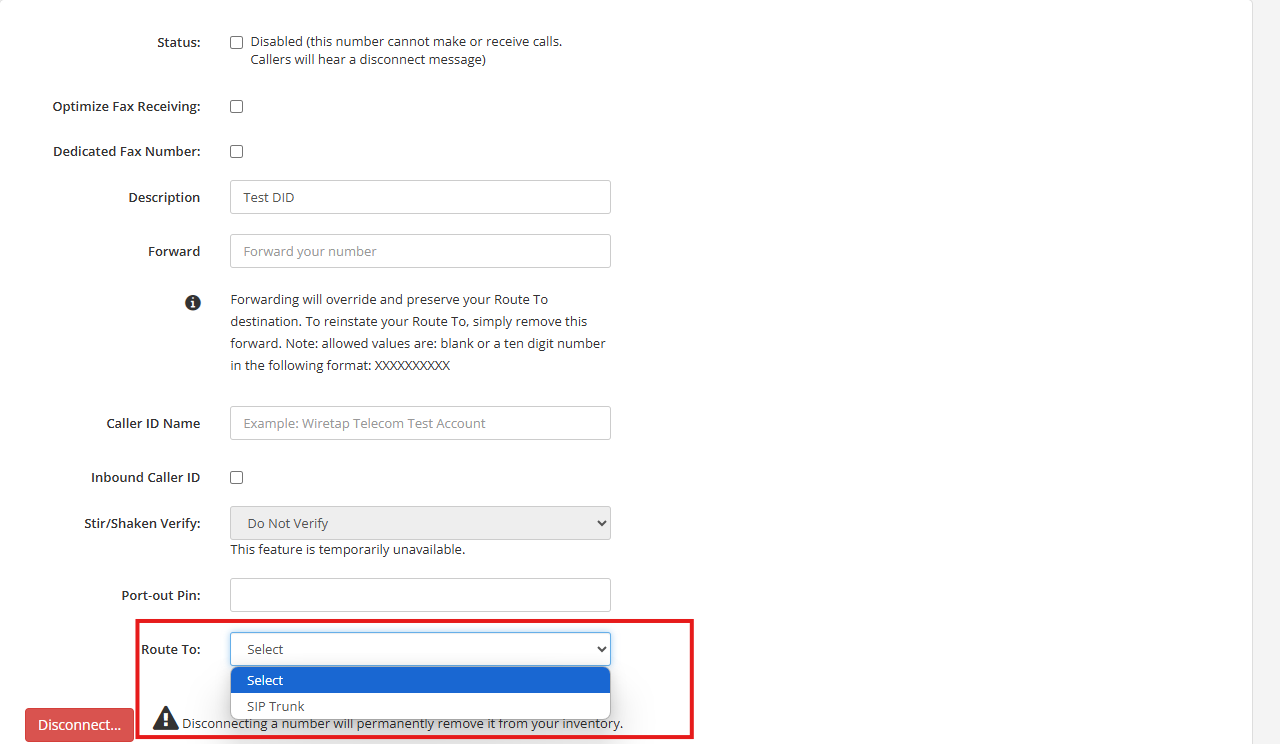
Select Route To: SIP Trunk
An additional drop-down menu will then appear, allowing you to select the appropriate trunk for routing
Step 4: Whitelist Management and PBX Templates
After setting up your trunk, navigate to Whitelist Management to view the list of IPs for Wiretap Telecom’s v2.2 trunking endpoints. Be sure to whitelist these IPs on your firewall. This section also provides our SRV records for redundancy.
Select PBX Templates to find quick start set up guides and templates for FreePBX and 3CX.
FAQ
Do I need a user-id and password when setting the remote end of the trunk?
No. We authenticate on IP address or by registration. So, you can choose your type of connection.
Can I blend my caller-id (name) with my trunk and certain phone numbers?
Yes. If you set a default caller-id (name) on your trunk then all phone number caller-id (name) values will override your trunk caller-id (name). If there isn't a phone number override then your trunk caller-id (name) will prevail.
I don't see a place to setup a failover trunk or failover number. How do I do this?
We support failover trunking and routing. However, we currently only support this at the phone number level. If you wish to setup a failover trunk then you would build the trunk and then assign failover settings in Phone Number Management.
When will my new trunk become active?
Your new trunk will attempt to auto-provision within approximately 60 seconds. If it does then our routing systems will bind to it immediately.