


Core-FaxTM User Guide
Version 1.5
Intended Audience
This user guide is intended for anyone needing to send and receive faxes to and from an e-mail client. More specifically, this document is for anyone who is considering, using, or planning on using, the Wiretap Telecom Core-Fax product.
Quick Start
If you need to get started with Core-Fax right away then watch this 3 minute video. It will walk you through the minimal setup needed to begin sending and receiving faxes.
About Core-Fax™
Core-Fax is a software-based telecommunications product developed, maintained and offered by Wiretap Telecom, LLC. It is used exclusively by Wiretap Telecom and Wiretap Telecom Partner Member Resellers. It was originally released on June 29th, 2017 and has received many accolades from our customers. To date, Core-Fax is the most active product in the Wiretap Telecom portfolio (The Wiretap Telecom Portal and Telecommunications infrastructure not withstanding). The fast adoption of the product forced our software team to release the acclaimed Core-Fax-Tracker product, which is an industry best-of-breed real-time fax tracking solution.
Please contact us for a white-label Core-Fax user guide if you’re a Partner Member who wishes to rebrand this document.
Core-Fax allows customers to send and receive faxes from and to their e-mail client. It is a robust faxing system which is highly integrated with the Wiretap Telecom Fax-Tracker product, which will be briefly described below.
Assumptions & Constraints
It is assumed that the user has access to the Wiretap Telecom portal and the Core-Fax product is enabled. It is further assumed that a telephone number already exists on the account to which Core-Fax will be assigned to.
A user of Core-Fax will need to have an active e-mail account with an ISP or a vendor such as Microsoft Exchange, Gmail, etc. These e-mail systems must produce emails with the MIME (Multipurpose Internet Mail Extensions ) standard, which is an Internet standard.
The maximum size for an e-mail sent to Core-Fax is 40MB. Most e-mail clients and e-mail servers have limits that are well below this compacity.
If you need to fax larger file sizes then please see the “Portal Faxing” section of this document.
How Core-Fax Works
Core-Fax has four major sections:
Number Management
Domain Management
Email Address Management
Fax Tracking
Number Management – Core-Fax doesn’t require that a number be assigned to it for outbound faxing. However, if the user wishes to receive faxes then this is a required feature. Any number of email addresses can be assigned to a number.
Domain Management – Core-Fax doesn’t require that a domain such as yourcompany.com be registered with it, however, if you do not register a domain then you will need to add individual email addresses via Email Address Management before faxing can begin.
Note: Not all domains are available for registration. The FQDN you provide must be approved before use and should be associated with the account. For instance, requesting domain approval for google.com will not be allowed. In the event that you wish to use an email such as mycompany@yahoo.com you will need to refer to Email Address Management.
Email Address Management - Core-Fax doesn’t require that email addresses be assigned. This feature exists for two main reasons:
Assigning Email Addresses in lieu of having a registered domain.
Overriding a setting for a specific number found in Number Management.
Fax Tracking - Fax Tracking is a visual-aid tool found on the portal. This tool allows you to watch in real-time a fax being sent or received via Core-Fax. This tool allows for fax viewing and provides faxing metadata.
Getting Started
You must first need portal access. Please contact us (see contacting us below) if you do not have access to the Wiretap Telecom portal.
The following steps describe how to initialize your portal for faxing. Please skip any necessary steps that you’ve already completed.
It is highly recommended that you register your domain. This will allow users with a shared email domain such as mike@yourcompany.com and sara@yourcompany.com to use Core-Fax without the need to configure each email address.
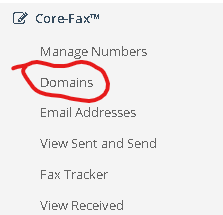
Step 1 – Domain Management : Register Your Domain by navigating to Core-Fax Domains.
If you haven’t enabled Core-Fax then you’ll see the message below. If you don’t then it’s already enabled.
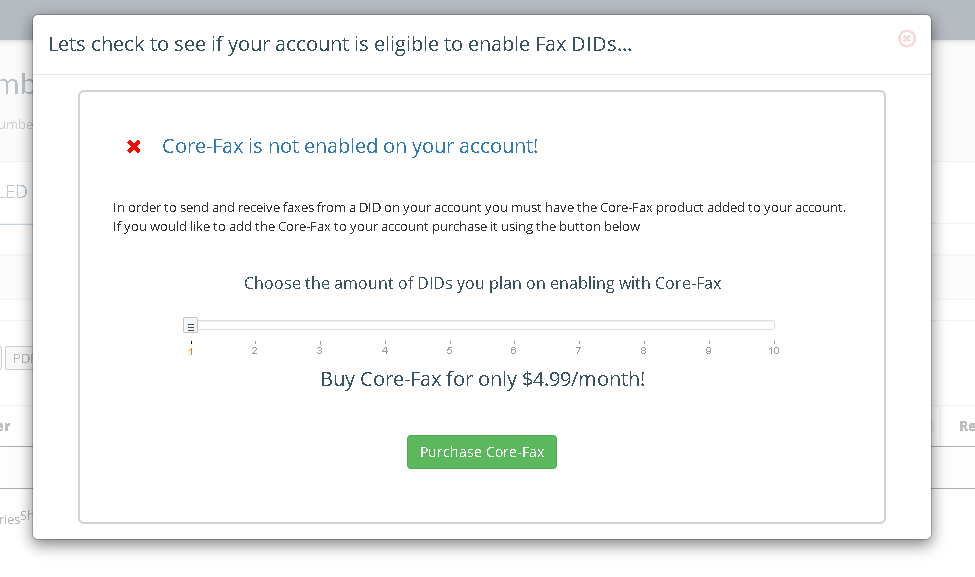
Once you purchase the Core-Fax product you’ll be able to navigate to the Core-Fax Domains section. From there you’ll see the following page:
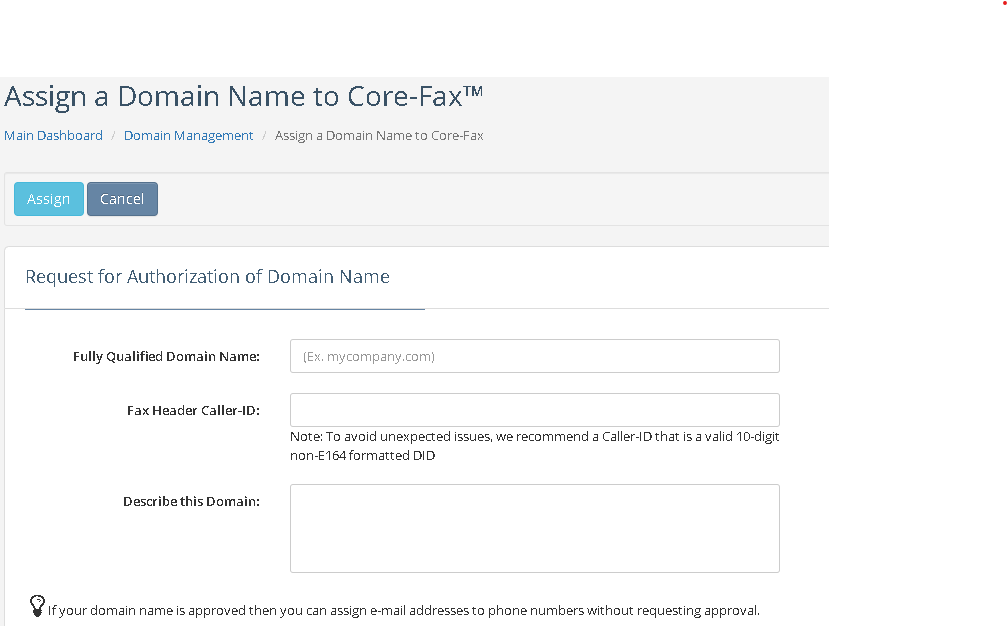
Enter your FQDN (not email address). Example, yourcompany.com
Enter an FQDN level default 10 digit caller-ID. It is highly recommended that you add a Fax Header Caller-ID and it is also recommended to use a caller-ID from a phone number on your account. If you choose a number that is not on your account then Wiretap Telecom will sign your fax (i.e., STIR/SHAKEN) with a poor attestation level, which will lower the possibility that your outbound faxes will be successful due to the receiver assuming the fax as potentially SPAM.
Describe your domain with your own words.
You will then receive a message indicating if your domain registration request was automatically approved or if there will be a vetting period. You will not be able to use your domain until approved, which could take up to 24 hours.
Note: The FQDN level Caller-ID can be overridden via Email Address Management.
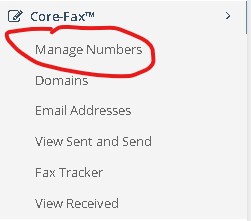
Step 2 – Number Management: Enable Core-Fax by provisioning a phone number to your account. Via the portal, navigate to Core-Fax Manage Numbers.
You will then be taken to a page listing your current Core-Fax numbers. It’s likely that this page won’t contain any numbers, let’s fix that by clicking on the blue plus (+) button.
you’ll be able to assign any number you wish to Core-Fax by re-clicking the blue plus (+). You’ll then see a new page, which is similar to the prior page, but will contain all the numbers on your account which are not already assigned to Core-Fax.
Choose the number you wish to enable for Core-Fax and single-click it. You’ll then see the following screen:
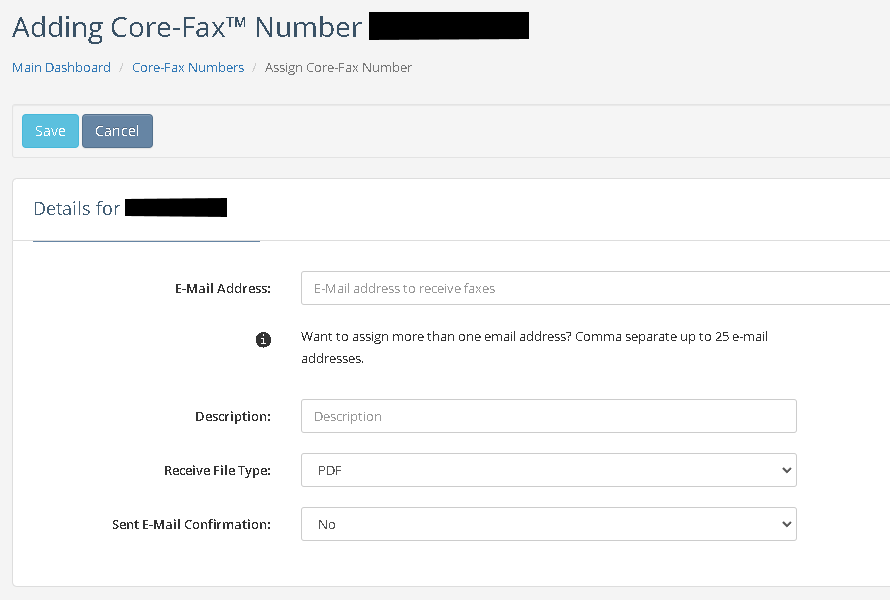
Enter the email address(es) you wish to assign to this number.
Enter a description of your choice.
Choose the receive file type (PDF recommended).
Choose if you wish to receive Success/Failed e-mails when sending a fax. Please note that only the sender and not every email address assigned to this number will receive confirmation emails.
At this point you’re ready to begin sending and receiving faxes. You won’t need to use the Email Address Management section unless you wish to override a parameter in the Number Management section. For example, let’s assume that your domain name is yourcompany.com and you’ve added two email addresses into the Number Management as shown below:
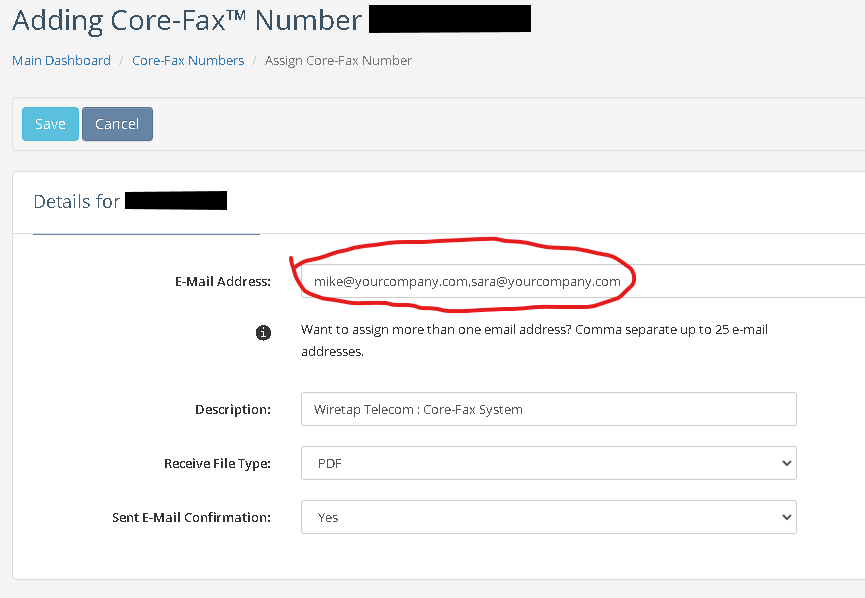
Notice that there are two email addresses in the list, comma separated (CSV). Notice that the Email Confirmation option is set to “Yes”. Assume that sara@yourcompany.com doesn’t wish to receive email confirmations. You have the following options to resolve this.
Assign Sara her own number and set the Confirmation option to “No”.
Turn off confirmation emails for everyone assigned to the number.
Use the Email Address Management section to override this value, which is the preferred method and is described in the next section.
Step 3 - Email Address Management. In the event that you don’t have an approvable domain (e.g., hotmail.com) you can still send and receive faxes via Core-Fax by provisioning specific email addresses (e.g., sara@hotmail.com). The following section is also used to override parameters created in the Number Management section.
Navigate to Core-Fax Email Addresses as seen below:
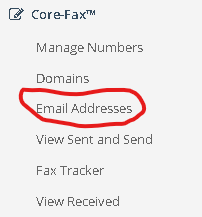
You’ll be taken to a new page which is likely empty. Click the blue plus (+) and then you’ll see the following page:
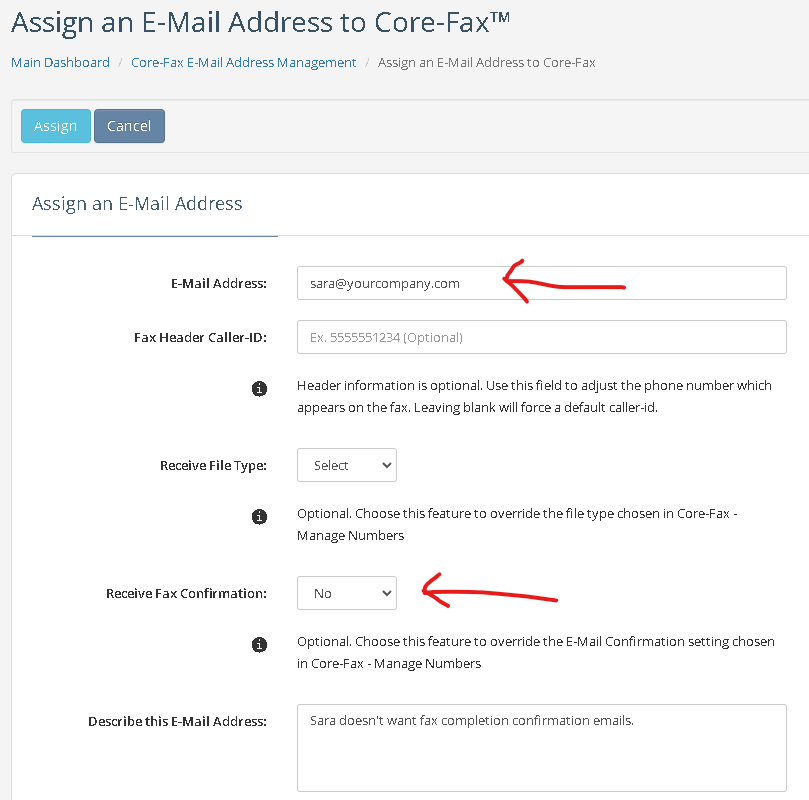
The E-Mail Address entered will create an override to the default values you provided when assigning that email address to the number via Number Management.
Set the Receive Fax Confirmation to “No”.
Optionally add a description for this override.
As you can see, the above screen also allows you to override the fax header caller-ID and File Type.
Now, when sara@yourcompany.com sends a fax she will never receive fax completion confirmation emails.
Sending Your First Core-Fax™
Now that you have setup your phone number(s) and email address(es), you can begin faxing by following the instructions below.
Navigate to your favorite email client just as if you’re preparing to send an email.
In the “Send To” field, put fax@core-fax.com.
In the “Subject” put in the destination phone number. Please note that you can use E.164 or standard variations such as 8774713603, 18774713603, +18774713603. You can also embed characters such as “Re: Title Company Fax @1 (877) 471-3603”. Lastly, if your account is provisioned with a default area code (via portal see Manage Plan Plan Details) you can use 7-digit numbers.
Attach one or more PDF files.
Leave the body blank as any values will be ignored.
Send the email.
Please note that if more than one PDF is attached to an email then individual faxes will be sent to the destination (one per attachment).
A variant of option 3 from above supports enterprise fax machines faxing via Core-Fax. Some enterprise faxing solutions won’t allow a Subject line in the LCD (Liquid Crystal Display) of the physical fax machine. In this event, Core-Fax also supports placing the destination number in the “Send To” as follows:
destination_number@core-fax.com. For example: 8774713603@core-fax.com. Using this method eliminates the need to place a number in the subject line.
Core-Fax™ - Adding a Cover Page
Adding a cover page is supported by Core-Fax and can be accomplished by attaching a cover page in no particular order with other PDF attachments. It is important to note that adding a cover page will fundamentally change the way the email (fax) is processed. For example, if five PDF files are attached with no cover page, five faxes will be sent (i.e., five phone calls to the destination). However, when a cover page is added, Core-Fax will append all PDF’s in no particular order into a single PDF file and prepend the cover page to it.
Core-Fax detects if you’ve added a cover page by looking for file names in the following formats (case insensitive):
cover page.pdf
coverpage.pdf
cover-page.pdf
cover.page.pdf
cover+page.pdf
cover_page.pdf
If more than one cover page is detected Core-Fax will process the first one encountered as the cover page and treat the others as standard fax pages.
Core-Fax™ Receiving → Dedicated
Dedicated fax receiving is when faxes are received via Core-Fax to a dedicated faxing phone number which is NOT shared as a voice number (i.e., Hybrid). This is the recommended and most reliable way to receive faxes.
How does "dedicated” work?
When a number is set to Dedicated Faxing Core-Fax doesn’t need to wait for Wiretap Telecom carrier switches to delay the call for approximately 5 seconds to ensure that fax-tone exists. There is no need for this delay if voice calls will never be present, thereby allowing Core-Fax to immediately process the call without disruption.
Any email addresses listed for a number in the Number Management section will receive incoming faxes to that destination.
To optimize your inbound faxing experience you’ll need to dedicate your number to Core-Fax. To do this navigate to Manage Numbers —> Numbers as show below:
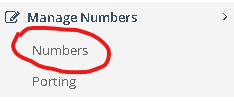
Then single-click the Core-Fax number that you assigned and then click the Edit / Mass Edit button. From there you’ll need to adjust your number as follows:
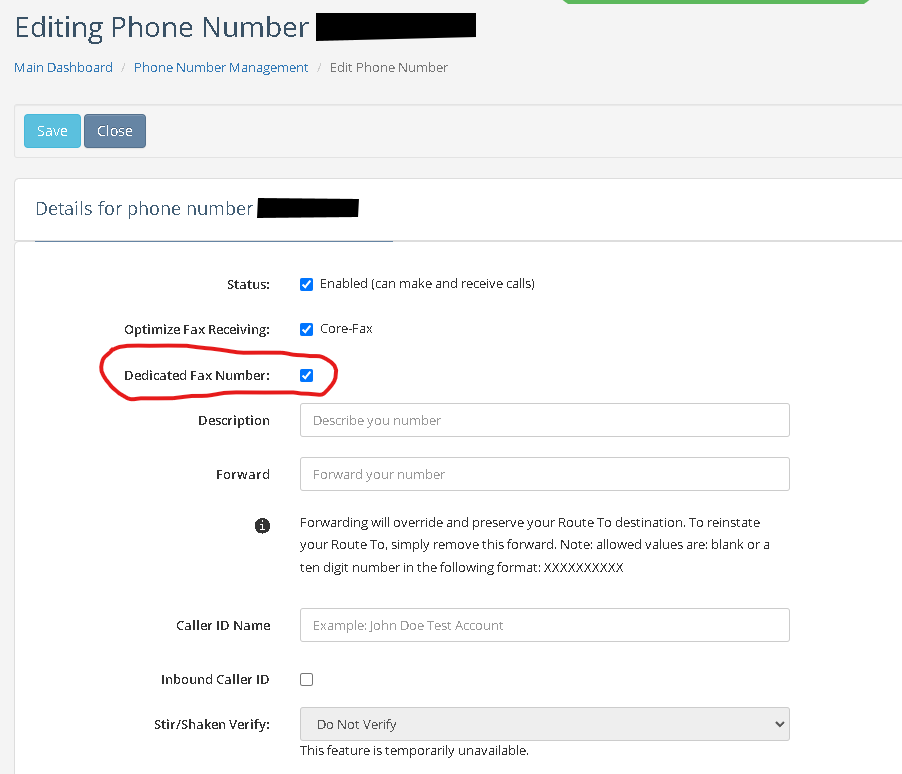
Notice that the Optimize Fax Receiving option has automatically been set to Core-Fax. This option can only be adjusted by removing the number from Core-Fax.
Make sure to “Check” the Dedicated Fax Number option (circled above).
Fax Receiving → Hybrid
Hybrid faxing describes a phone number that is used for voice calls and for inbound faxes. Core-Fax numbers default to this setting automatically, but to ensure you’re Core-Fax number is setup for Hybrid calling, check to ensure that the Dedicated Fax Number setting in the Dedicated Fax Receiving section of this document is unchecked (see below):

How does "hybrid” work?
Hybrid faxing forces Wiretap Telecom carrier switches to answer all inbound calls for approximately five seconds. If fax-tone is detected the call is sent to Core-Fax for processing, otherwise a voice route is taken if one exists.
It is important to note that not all sending fax machines are compatible since many fax machines don’t correctly adhere to the somewhat loose T.38 standards of. This said, there will likely be times when a fax is sent to the voice route. This can cause issues with voicemail and can be somewhat of an encumbrance to the person receiving the fax via audible tones on their phone. The only way to resolve this completely is to use a dedicated fax number.
There are times when a fax needs to be accompanied by a cover page.
Caller ID
As discussed in the above sections, caller-ID is an important feature of faxing. It is imperative that caller-ID is setup correctly for outbound faxing. The following is the hierarchy used by Core-Fax to use the customer’s desired caller-ID
Note: A fax Caller ID is used as the sending caller-id as well as the printed header number on the fax document itself.
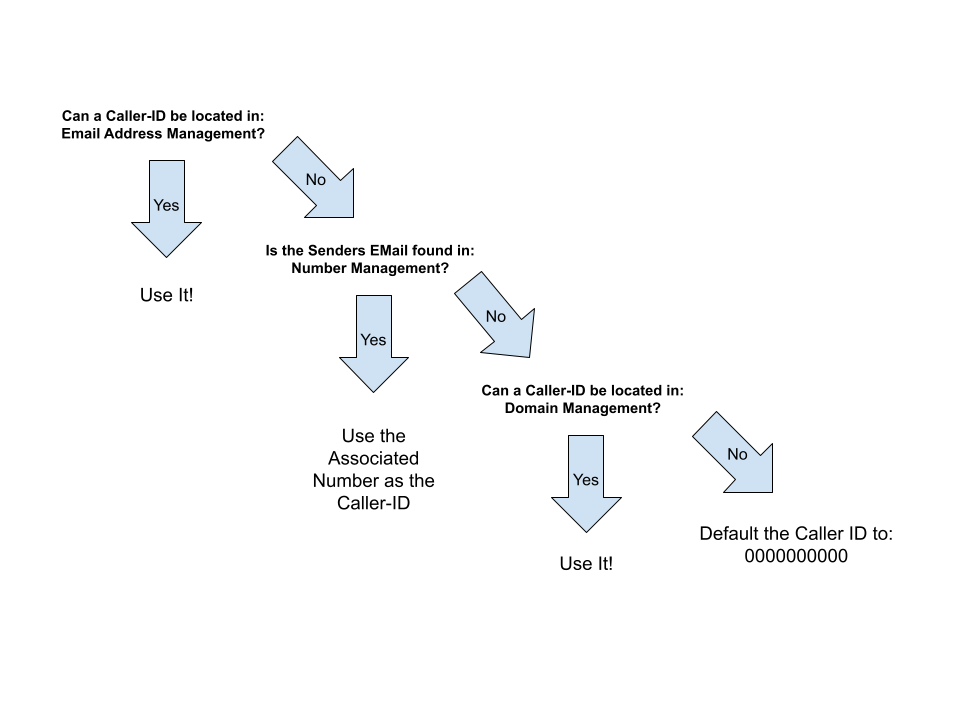
As illustrated above, Core-Fax will use a hierarchical process to determine the desired caller-id. If it cannot locate a caller-id the fax will be sent with a default caller-id of 0000000000. This will likely force some receiving systems to reject the fax due to a mal-formed caller-id (i.e., SPAM).
Caller-ID uses this hierarchical process so that the customer can override caller-id. For instance, caller-id (fax header numbers) can be added at the e-mail address level to override the higher level caller-id settings.
Keep in mind that an email address can be listed on many different phone numbers. This said, if the email address doesn’t have an override in the Email Address Management section, Core-Fax will locate the phone number for the associated email address where the phone number is a “least shared” number. For example, if Sara has a dedicated phone number where she is the only email listed on the phone number (Number Management) and Sara is also listed on another phone number with many additional email addresses associated with it as well, Core-Fax will choose the Caller-ID from the number Sara is associated with which has her as the only email (i.e., the dedicated number).
Fax-Tracker™
Due to the success of the Core-Fax product, Wiretap Telecom realized the importance to create the only real-time fax tracking software in the industry. To-date, the Fax-Tracking portal page remains one of the most popular pages in the Wiretap Telecom portal (based on visits and visit duration). The Fax-Tracker comes free with the Core-Fax product and is used extensively by our customers and managed service providers. If an MSP or customer has multiple accounts they can watch real-time faxing via the Fax-Tracker console, where all faxes are consolidated across accounts. Likewise, if a single customer account has enabled Core-Fax, the customer receives all the same benefits with no additional costs.
What is the Fax-Tracker™
Simply put, the Fax-Tracker consists of a proprietary fax tracking software-based system developed and maintained by Wiretap Telecom that displays the in-transit status of your fax, whether it be inbound or outbound, in real-time. No other faxing competitor in the industry has the Wiretap Telecom Fax-Tracker™ software.
Below is an example display of what you can expect from the Fax-Tracker. Within seconds of sending a fax via Core-Fax, or within seconds of receiving a fax into Core-Fax you’ll see dynamic movement without the Core-Fax module without the need to ever refresh your screen.
.png "image(2).png")
Portal faxing
Core-Fax allows for faxing via the Wiretap Telecom portal. There is a desire from our customers to be able to sign into the Wiretap Telecom portal to initiate a fax. This could be due to many reasons such as simple convenience, or because there is no email client available, or perhaps because the PDF attachment is too large for the email client. Regardless of the reason, the end-user has free access to send a Core-Fax fax via the portal. To do this navigate to Core-Fax —> View Sent and Send within the Wiretap Telecom portal as illustrated below:
.png "image(3).png")
The “View Your Outbound Faxes” page will display. It is important to note that many of the features of this page has been deprecated by the Fax-Tracker module. This page has remained available due to the demand from our customer to send faxes via a portal feature rather than from email. To send a fax via the Wiretap Telecom portal, simply click the blue plus (+) sign. You’ll then see a page as illustrated below:
.png "image(4).png")
In the Send To: Put the fax number destination number.
The Send from is a Caller-ID number available on your account. Choose the desired Caller-ID.
Upload the file you wish to send as a fax.
Please note that currently the Wiretap Telecom portal is limited to one file per fax.
Note: The maximum size of a fax file for faxing via this method is 50MB, which is larger than the Core-Fax standard and in most cases greatly exceeds to maximum size of most email clients and email servers.
Core-Fax™ and Core-Fax-Tracker ™ are registered trademarks of Wiretap Telecom, LLC.
All Rights Reserved. Copyright © 2012-2024.