.png)
Configuring Your Trunk With FreePBX 17 - Registration Trunk (PJSIP)
About FreePBX 17
FreePBX 17 is the latest version of the powerful open-source PBX platform, designed to provide flexible and user-friendly communication management. With improved performance, security enhancements, and new features, FreePBX 17 makes it easier than ever to manage your phone system.
This guide will walk you through setting up your SIP trunk using PJSIP, a modern and versatile SIP channel driver in FreePBX. Compared to the older Chan_SIP driver, PJSIP offers better performance, enhanced NAT handling, and improved support for multiple registrations. By following these steps, you'll ensure a smooth and reliable connection for your inbound and outbound calls.
Supporting Documentation:
Pre-requisites
Download and install FreePBX17
Configure basic settings for your FreePBX (Administration and Firewall settings)
Create a SIP trunk on the Wiretap Portal and assign DID(s) to your trunk.
Step 1: Configure SIP settings
Here we’ll add our network settings
Navigate to Settings —> Asterisk SIP Settings to verify your network settings.
Make sure to enter the external and local network addresses in both the General SIP Settings and PJSIP Settings.
Click Submit and Apply Config.

Step 2: Create a SIP Trunk
Next, we’ll configure our SIP Trunk using chan_pjsip.
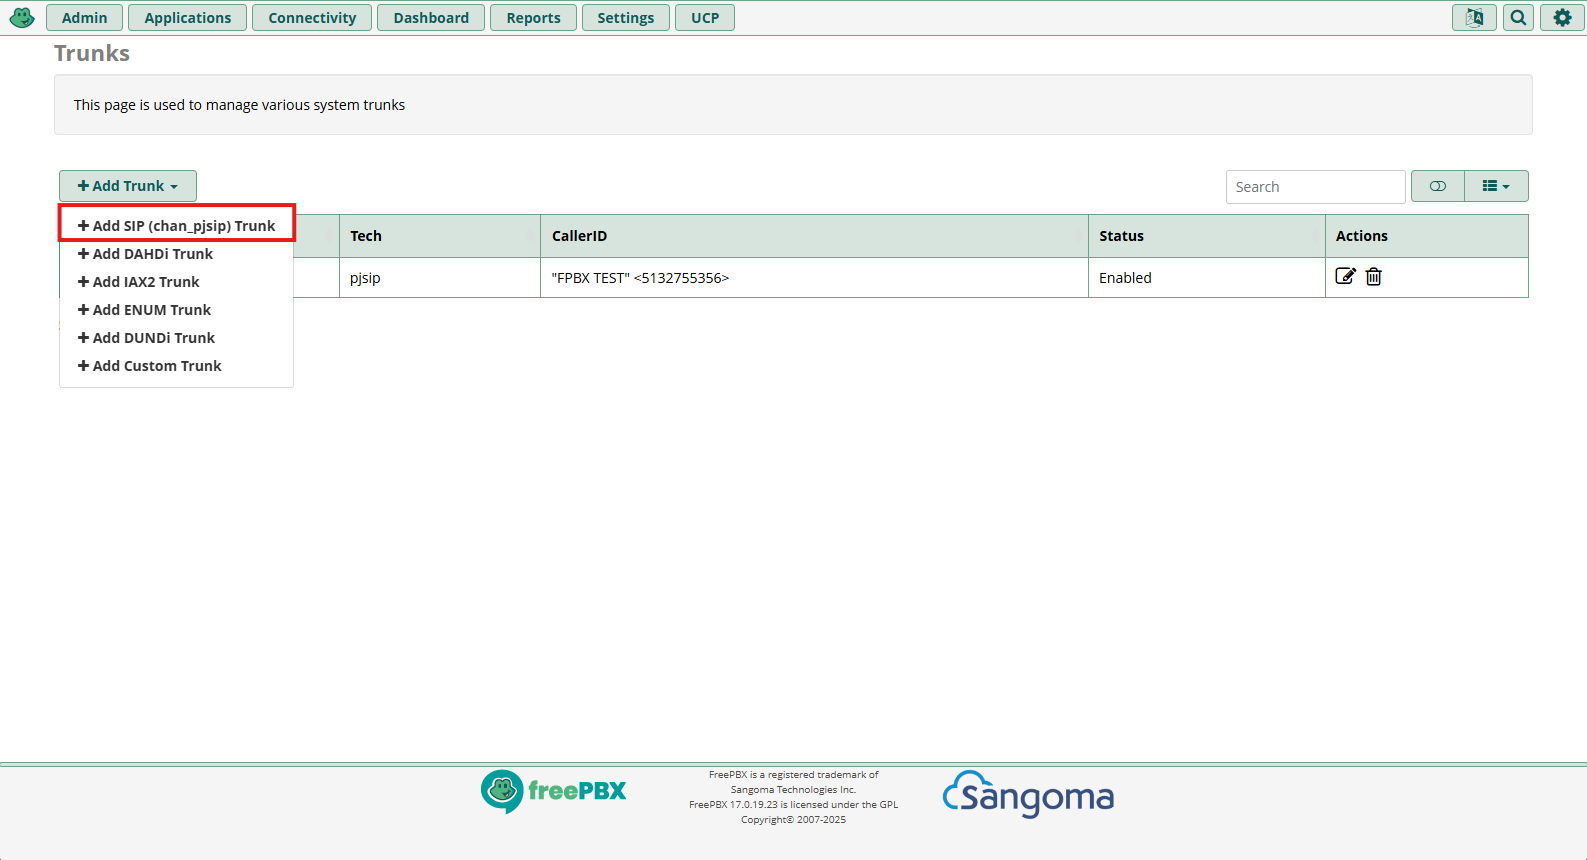
Navigate to Connectivity —> Trunks and select Add SIP (chan_pjsip) Trunk.
Next, we’ll input our general settings. Here, I’ve given my trunk a name and set the outbound caller ID.
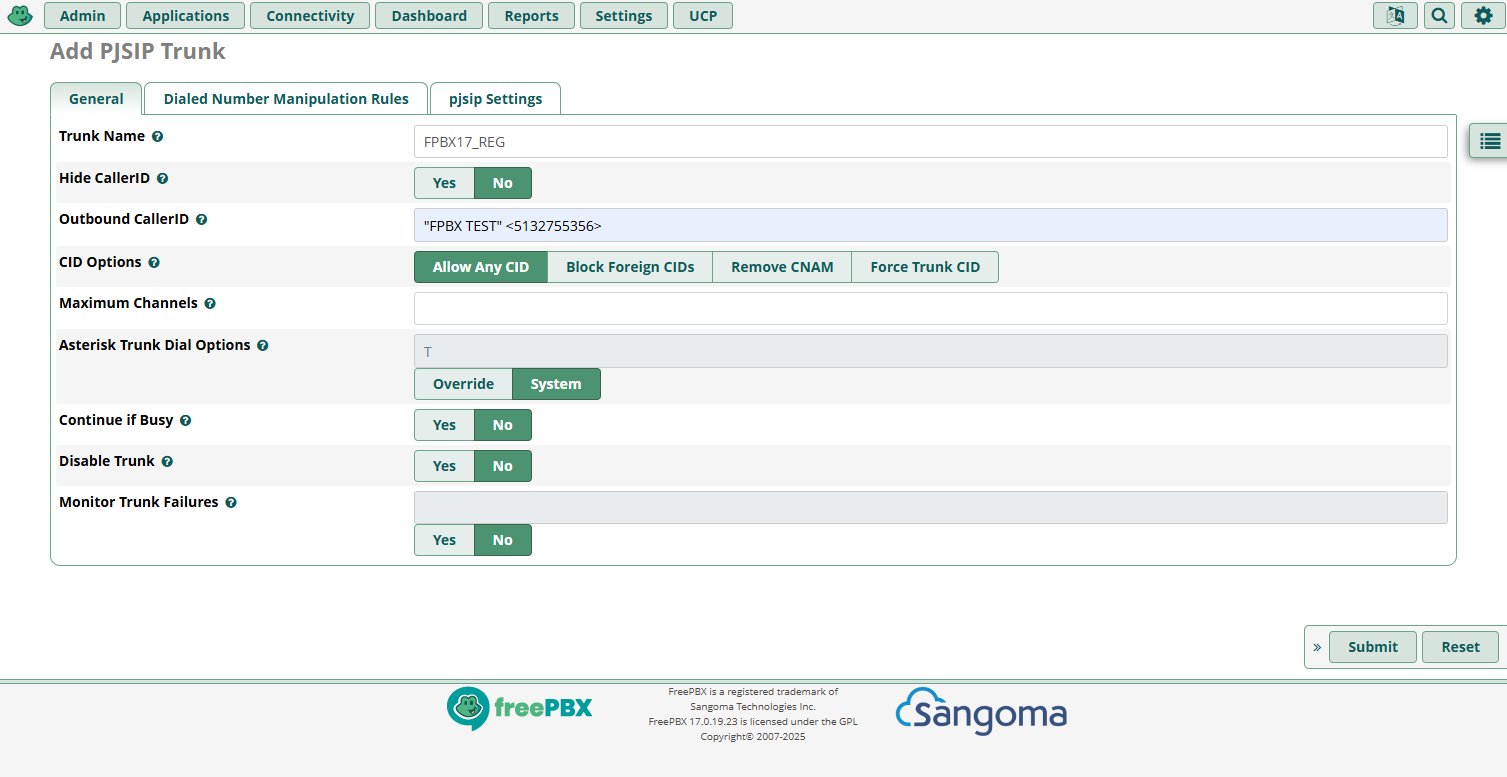
A Note About Caller ID
If you don't configure an Outbound CID for your trunk, you'll need to set one on each applicable extension instead. Without setting a caller ID at either the trunk or extension level, your calls will reach us lacking a valid caller ID.
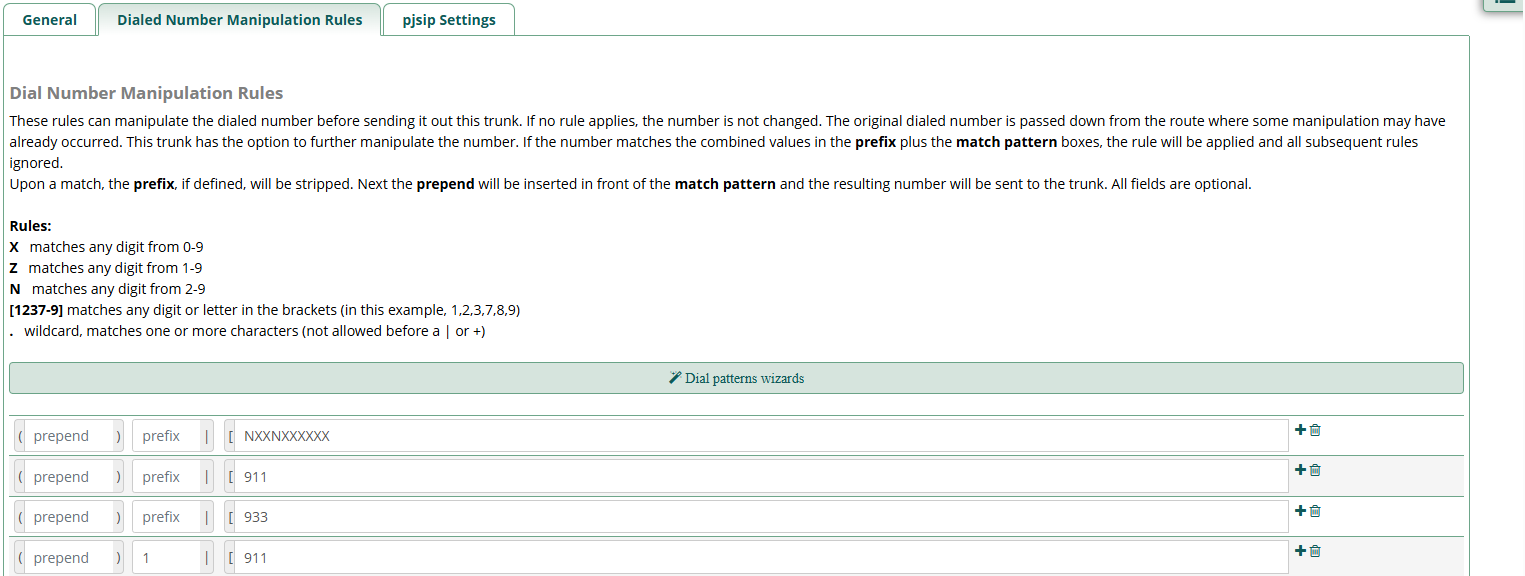
Then we’ll set up our Dialed Number Manipulation Rules. Select the pjsip Settings tab, then the General tab.
You can use the Dial Patterns Wizard for this step to create custom rules depending on your use case.
Below are some basic dial patterns for US numbers:
Now we’ll move on to our pjsip settings. Select the pjsip Settings tab, then the General tab.
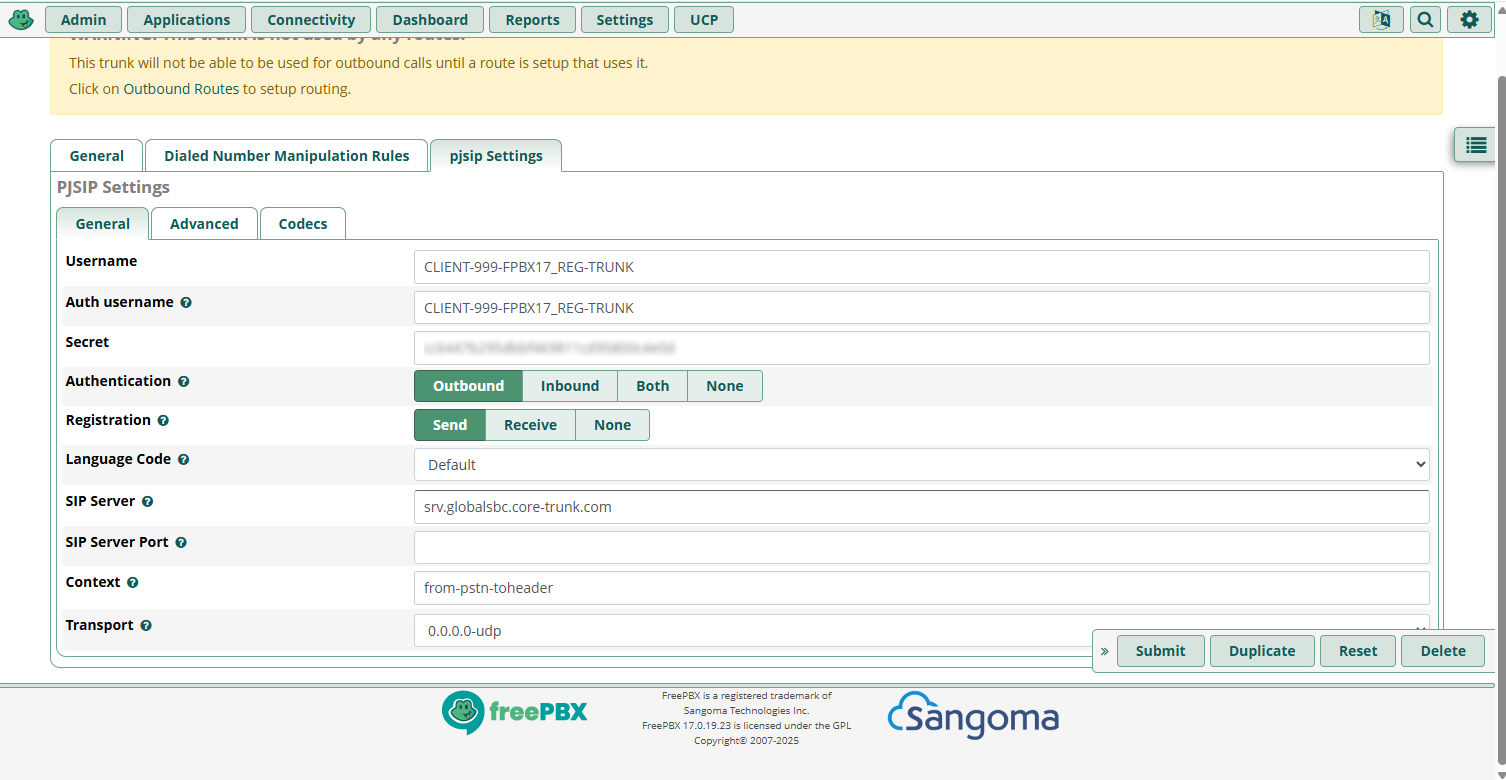
Since we’re using a registration trunk, we’ll need to include our registration credentials.
Be sure to specify:
Auth Username: The User ID generated when you created your trunk on the Wiretap portal
Secret: The password you generated when you created your trunk on the Wiretap portal
SIP Server: srv.globalsbc.core-trunk.com
Sip Server Port: Leave blank if using SRV record. The SRV record defaults to port 5060.
Context: from-pstn-toheader
Step 3: Apply Changes
Select Apply Config
Add Extensions, Inbound and Outbound Routes