
Yeastar SMS Setup Guide
Before you begin, please check the following prerequisites first!
1. Ensure your you’re using a compatible Yeastar PBX such as the P-Series Phone System on Version 37.14.0.24 or later and have access to the Linkus UC client.
2. Please note that Wiretap Telecom requires all customers sending SMS messages to be registered with TCR. This can be done on our Portal by navigating to Core-SMS -> TCR Form.
1. Enable SMS for a DID(s) if you have not already (Wiretap Portal)
- Navigate to Core-SMS -> Manage Numbers -> Click on "Plus sign" -> Select Number -> Click Enable
2. Create a new trunk and migrate DID(s)/settings
- Login to your Yeastar PBX Dashboard
- Navigate to Extension and Trunk —> Trunk and select “Add”
-For this example, we’ll be configuring a Register Trunk
In the Basic section, configure the following settings:
Name: Choose a name to help identify your trunk.
Trunk Status: Select Enabled.
Select ITSP Template: Select General.
In the Detailed Configuration section, select the trunk type and enter the following information:
Trunk Type: Select Register Trunk
Transport: DNS-NAPTR (if using SRV record)
Hostname/IP: srv.globalsbc.core-trunk.com
Port: 0
Domain: srv.globalsbc.core-trunk.com
Username: The User ID that was generated when you created the trunk on the Wiretap portal.
Password: The password that was generated when you created the trunk on the Wiretap portal.
Authentication Name: Same as User ID
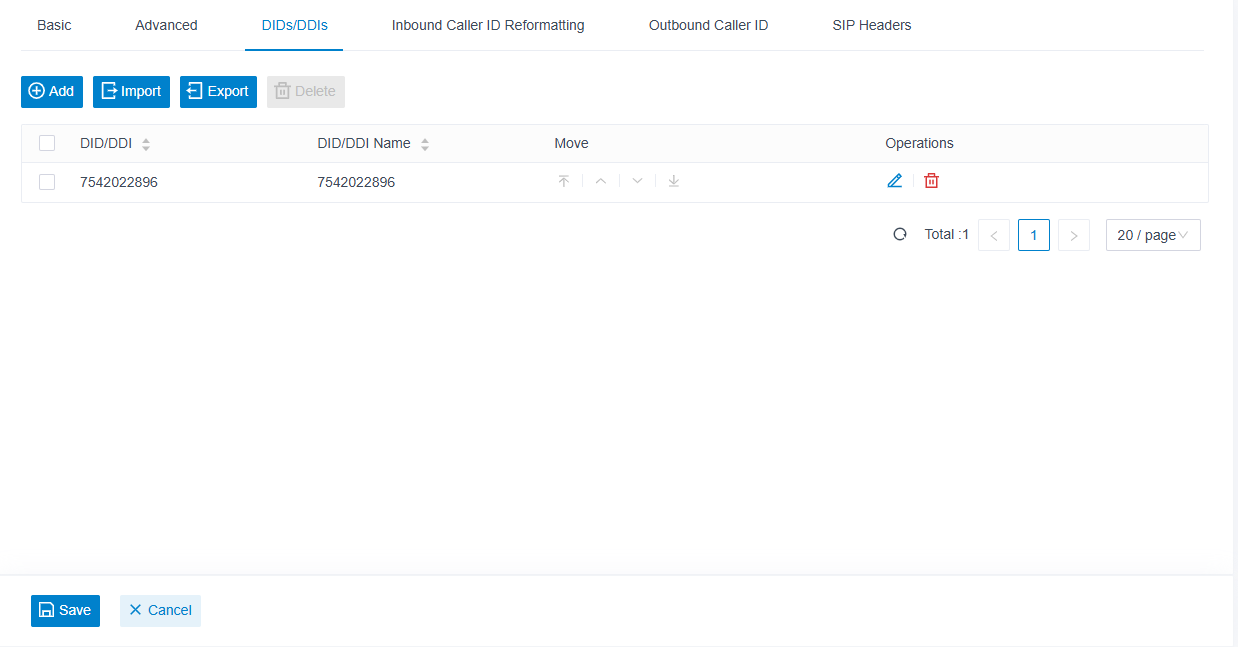
- Go to the DIDs/DDIs tab in your newly created trunk, add your SMS-enabled number(s), and click Save.
4. Generate APIv2 Key
- Navigate to the Wiretap portal.
- Hover over your Avatar in the top right -> Click Company Settings -> Click API Keys on the left-hand side -> Generate a new API key or use an existing key.
5. Set Up Message Channel
- Go to Messaging —> Message Channel.
- Click Add and select SMS.
- In the Authentication tab, configure the following settings:
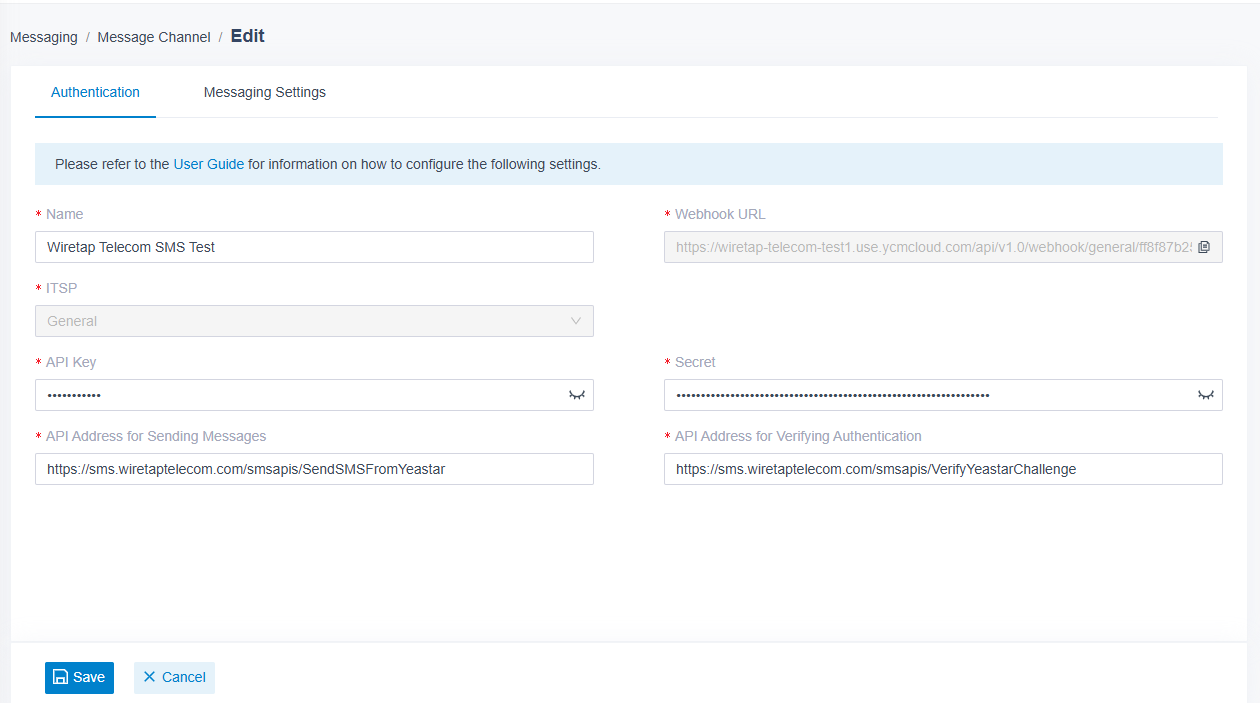
Name: Enter a name to help you identify the channel.
ITSP: Select General.
API Key: Copy and paste the Auth Token you created in step 4.
Secret: Copy and paste the Bearer Token you created in step 4.
API Address for Sending Messages: https://sms.wiretaptelecom.com/smsapis/SendSMSFromYeastar
API Address for Verifying Authentication: https://sms.wiretaptelecom.com/smsapis/VerifyYeastarChallenge
- Click Save.
6. Enable Webhook on SMS-enabled DID (Wiretap Portal)
- Go to the Wiretap Portal and login
- Navigate to Core-SMS -> Manage Numbers and click on the SMS-enabled DID
- Enable "Receive to Webhook API" and choose "Yeastar Webhook" for Webhook Type
- Paste Webhook URI & Save
.png)
7. Configure Messaging Settings
- Select the Messaging Settings tab.
- In the Number section, click Add to add a message routing rule.
- In the Number field, add the number you’ve enabled for SMS in E.164 format (ie:+15555555).
- Create a destination for inbound messaging (Extension or Message Queue).
- Select extensions allowed to create messaging sessions in the column on the left titled Available and use the carrot (>) to move them into the Selected column.
- Select Save.
8. Open your Linkus Client and Start Sending SMS!
Don’t forget to use E.164 format when initiating an SMS!
Otherwise, your messages wont be delivered