.png)
Configuring Your Trunk With Yeastar P-Series
About Yeastar P-Series
The Yeastar P-Series PBX System is a modern, feature-rich communications solution designed to meet the needs of small and medium-sized businesses. It combines powerful unified communications tools, advanced call handling capabilities, and seamless integration options. The P-Series offers flexibility whether deployed on premises or in the cloud. With its user-friendly interface and robust feature set, including call routing, video conferencing, and call center features, the P-Series delivers reliable performance and scalability to support growing business communications.
Supporting Documentation:
Yeastar P-Series Documentation
Pre-requisites
Download and install Yeastar P-Series
Create a SIP trunk on the Wiretap Portal and assign DID(s) to your trunk.
Step 1: Add a SIP Trunk in P-Series PBX
First, we’ll add our trunk:
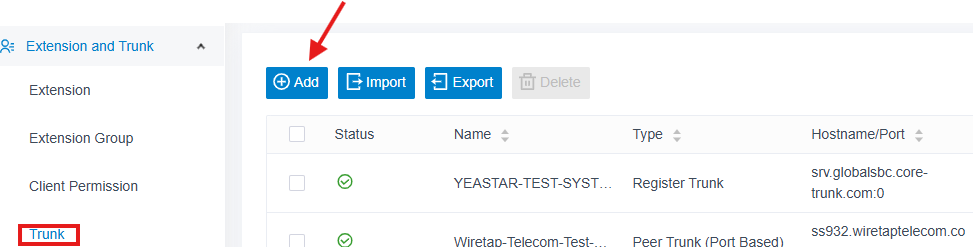
Navigate to Extension and Trunk —> Trunk.
Select Add to add your trunk.
Step 2: Configure Your SIP Trunk
Next, we’ll configure our SIP Trunk.
Basic Configuration:
Name: Give your trunk a name to help identify it.
Trunk Status: Select Enabled.
Select ITSP Template: Select General.

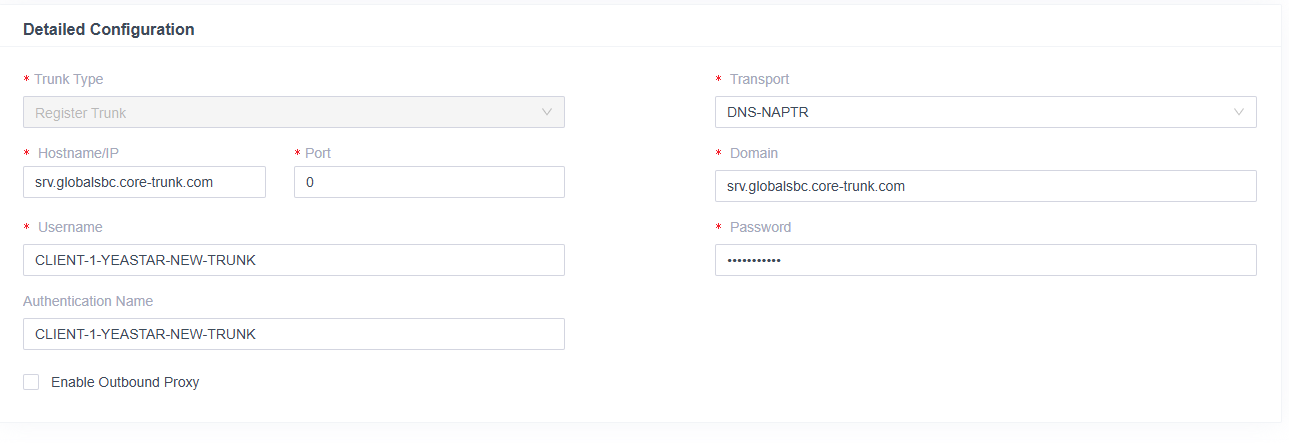
Detailed Configuration:
Trunk Type: Select Register Trunk.
Transport: Choose DNS-NAPTR.
Hostname/IP: srv.globalsbc.core-trunk.com
Port: 0
Domain: srv.globalsbc.core-trunk.com
Username: The User ID generated for your trunk on the Wiretap portal.
Password: The password generated for your trunk on the Wiretap portal.
Authentication Name: The User ID generated for your trunk on the Wiretap portal.
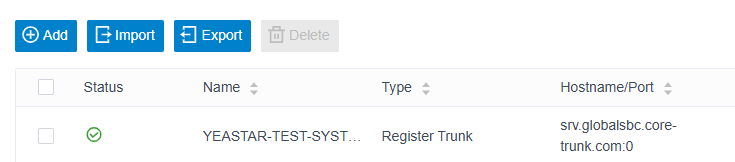
Click Save and Apply.
Check your trunk status to ensure your trunk has registered:
Step 3: Configure an Inbound Route
To control how calls from your trunk should be routed, you will need to configure an inbound route.
Navigate to Call Control —> Inbound Route and click Add.
Configure the inbound route:
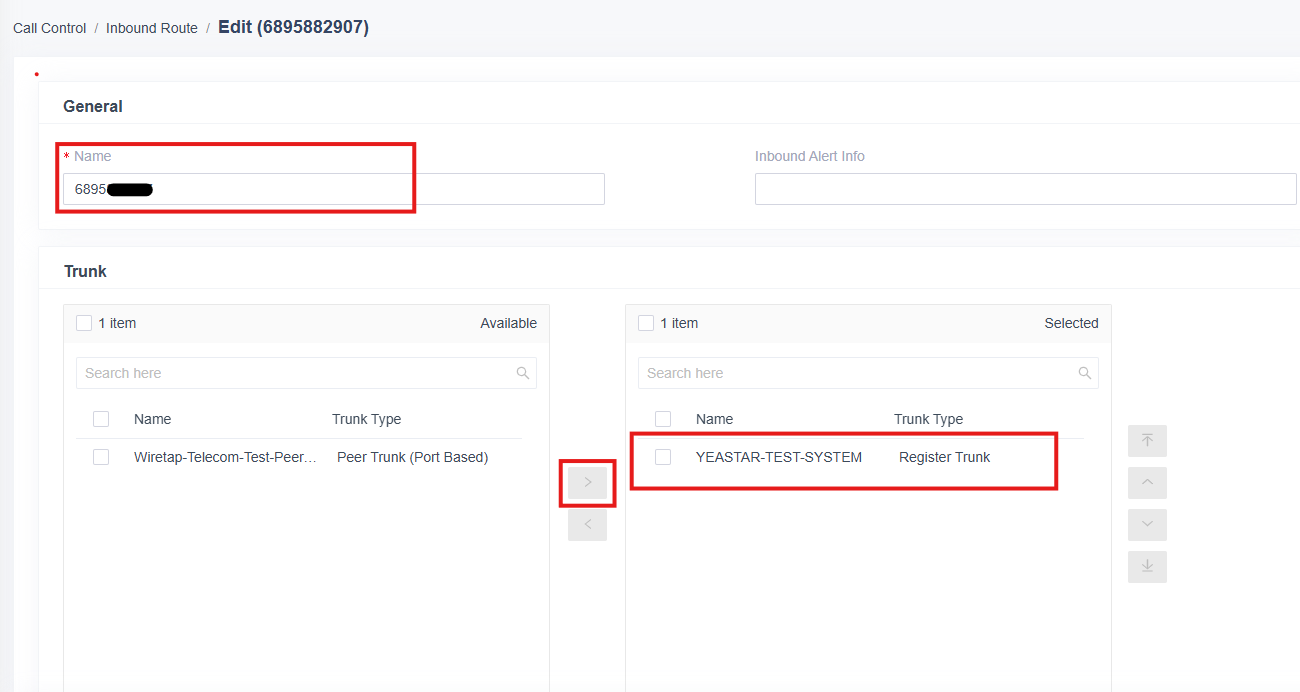
Name: Give your inbound route a name.
DID Pattern: Specify the DID pattern to match and pass the incoming call through this inbound route.
Trunk: Choose your trunk on the box on the left and use the carrot to move it to the box on the right.
Caller ID Pattern: Define the caller ID number that is allowed to call this inbound route. Leave blank if none.
Default Destination: Select the default destination or set with Time Condition.
Click Save and Apply.
Step 4: Configure an Outbound Route
To make outbound calls from your SIP trunk, you’ll need to create an outbound route.
Navigate to Call Control —> Outbound route and click Add
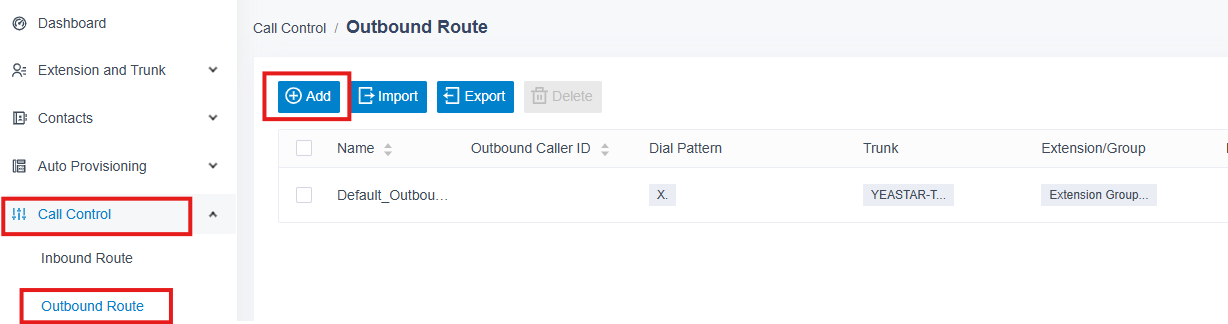
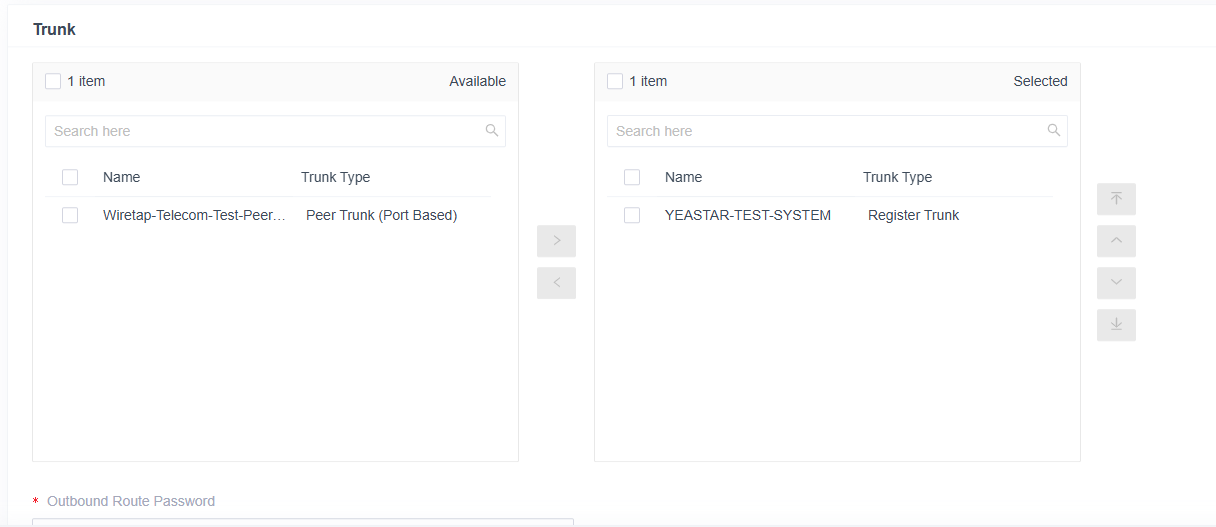
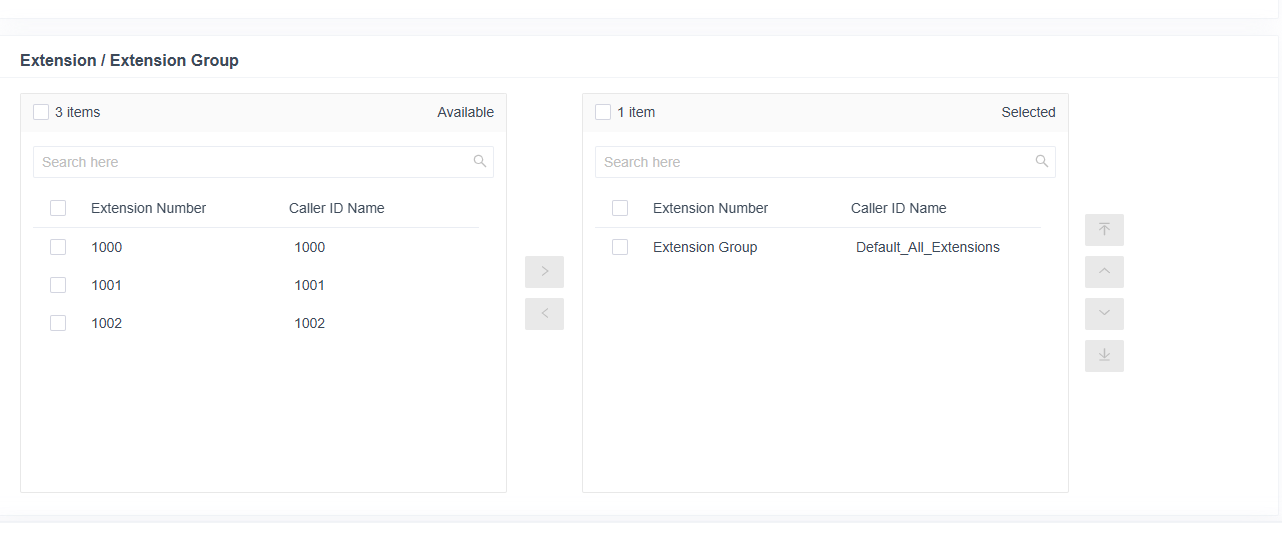
Configure the Outbound Route.
The system checks the number against the pattern defined in Route 1. If it matches, the call is placed using the specified trunks. If not, it proceeds to compare the number with the pattern in Route 2, and continues in this order. Outbound routes are evaluated from top to bottom, with higher-priority routes checked first.

Name: Give the outbound route a name to help you identify it.
Role: Select the role that can use this outbound route to make outbound calls.
Dial Patterns: Set the dial patterns.
Trunk: Select the SIP trunk.
Outbound Route Password: You can prompt users for a password before allowing outbound calls.
Extension/Extension Group: Select the extension(s) or extension groups that are allowed to use this outbound route.
Time Condition: Select time condition to allow this outbound route.
Click Save and Apply.